Uploading rubrics and grading forms to Turnitin.
If you want to use rubrics and grading forms with Turnitin there are a number of stages:
- Add a rubric to your library: This could be through creating a rubric OR uploading one someone else created. In either case, the rubric is attached to you, so you’ll only have to do it once for each rubric / grading form that you want to use.
- Attach a rubric / grading form to an assessment. Only 1 instructor who is involved with the module needs to do this, so you may be able to use a form that someone else attached.
It is not possible to attach a rubric to an individual assessment until at least 1 student has submitted.
This post will look at uploading rubrics / grading forms that someone else created.
This differs slightly, depending on whether or not any students have uploaded work to the assignment.
Note:
These instructions apply to the integration we have between My Dundee and Turnitin. If you are using Turnitin with Moodle, the integration that is used for that allows rubrics to be attached at the time that the assessment is created. It also allows students to see the rubric before they upload work. This is not possible with My Dundee.
No Students have yet submitted any work
In this scenario, you will be able to add a rubric to your library but NOT attach it to the assessment.
1: Launch the rubric manager from the submission inbox.


5: You now have to keep the rubric in your library until at least 1 student has submitted.
6: To attach it to an assignment, follow the steps below – ignoring those about importing the rubric.
At least 1 Student has submitted some work
In this case, you will be able to add a rubric AND to attach it to the assessment.
Assuming you haven’t yet added the rubric, and students have started to submit – you can either attach the rubric from the submission in box (see above) or from a submitted piece of work.
1: Open an item that’s been submitted, click the rubric manager icon, and then click the cog wheel.


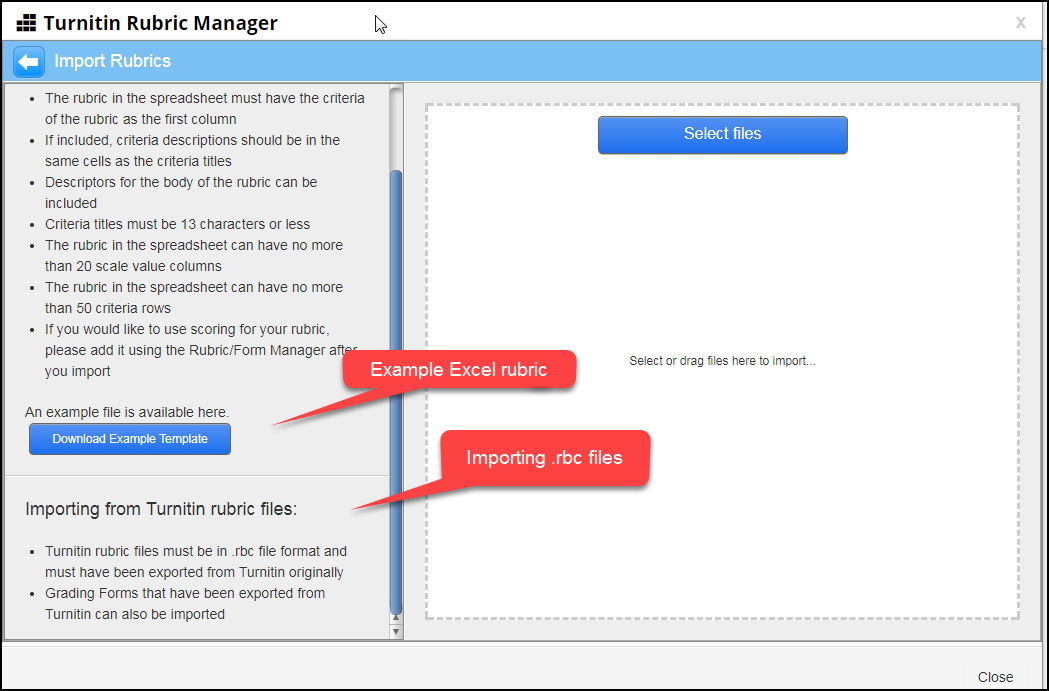
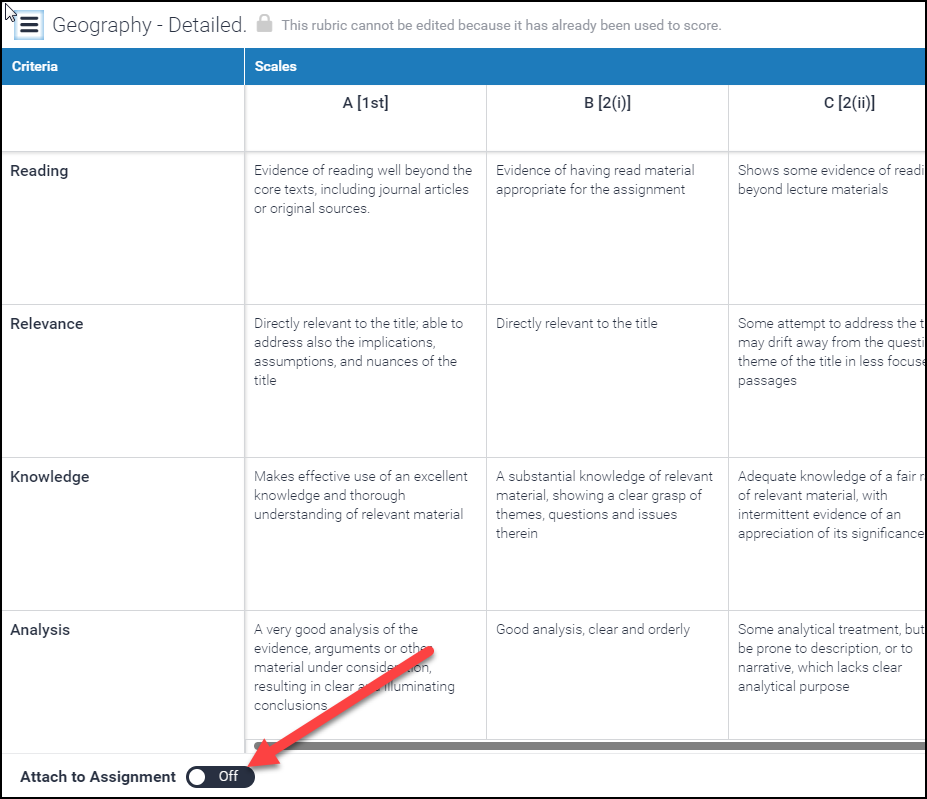
You’ll see a list of rubrics that are already in your library. The ticked one is the most recently used; you’ll see in this case that “rename” and “delete” are greyed out, as it’s a form that has been used before, so can’t be edited. If you need to upload a file, click upload.
3: Upload the file that you need – it will either be a .rbc file (note that you can’t open .rbc files anywhere other than the rubric manager); or it an excel file.
4: Once you have uploaded the file, it will open, and you will see a pencil next to the rubric name, and the option to rename / delete the rubric. If you want to edit it, click the pencil. You can only edit / rename / delete rubrics before they have been used.

Important:
All staff who are marking can use the same rubric, once it has been attached. They do not all need it in their library. It’s important that once someone has attached a rubric to an assignment, no one else tries to attach a different one, or remove the one that is attached, as it could cause previous comments to be lost. It is strongly recommended that in a marking team the module convener or a named administrator is tasked with attaching the rubric, to avoid potential problems.