What is it?
You can share your Padlet by adding individual people to an access list, share a URL, or embedding it in a module. Here we will show you how to add people, adjust permissions, and find your URL.
We have a dedicated guide on embedding a Padlet in your module, and on how to customise your URL.
What does it do?
Learn how to share access to a few specific people, or share a link. You will need to make sure to edit your overall permissions for accessing the Padlet as well as determining what people can do once they have accessed it.
What should I know?
Adjusting permissions
If you are sharing a link or embedding your Padlet, you will need to adjust permissions to allow people to access it. This includes settings on who can see your Padlet, and what they can do once they access it.
Step 1: Go to your Padlet site and go to Share at the top right. This may either be at the top of the page, or in a vertical list of icons and the icon will look like an arrow.
Step 2: In the Share menu, you can see your current visibility settings under the Privacy head. If you need to change this, click Change Privacy.

Step 3: In the Change Privacy menu, you are presented with four privacy options: private, password, secret, and Org wide. You will most likely want to set this to Secret, but see more details for these settings next.

- Private – This keeps the Padlet locked so only you and any named people you add (using the method in this guide) can access it.
- Password – This is like the Private setting, where only you and named people you’ve added can see it by default. However, you can also add a password so that anyone with URL and password can see it.
- Secret – This is the most useful setting in most cases. This hides the Padlet from searching, but if you share the URL or embed the Padlet in your module, those users can see it.
- Org wide – You will most likely want to avoid this. This will make the Padlet completely open to anyone with a UoD Padlet account, and it will be listed under “Shared” in the dashboard for everyone with UoD Padlet accounts.
Step 4: At the bottom of the Change Privacy menu, you will find the Visitor permissions options.

Clicking on the drop down menu will present you with the three visitor permissions options:
- Can read – This will only allow other users to view the content of your Padlet. This could be useful for content you don’t want students to edit or comment on.
- Can write – This will allow other users to add content to your Padlet. This is probably the most common option if you want students to be able to participate in the Padlet.
- Can edit – Be very careful when using this setting. This will allow other users to add, remove and edit any content on your Padlet.
Step 5: Once you’ve got these settings in place, be sure to click Save!
Step 6: Now you can click Back to the general Share menu (from step 1).
Step 7: Click on the item Copy link to Clipboard. This will give you the URL you can share with people now that you have determined your sharing settings!
Remember, you can edit your URL to something specific if you would like.
Allowing commenting on posts:
Adjusting the visbility settings and visitor permissions lets you control new and existing posts. But you may also want to allow or restrict commenting on posts.
Step 1: Click the cog wheel at the right-hand side of your Padlet to go into Settings. This may either be at the top of the page, or in a vertical list of icons.
Step 2: Scroll down to the Posting section and adjust the toggle for Comments.

Step 3: Click Save at the top of the side panel.
Add individual users:
Step 1: In the Share menu, click Add members.
Step 2: In the Add Members menu, search for the user you want to add using either their name.
Note: The person who you are trying to add will already need to have a Padlet account. If they don’t, have the person access the University of Dundee’s Padlet account and login using Microsoft to use Single-Sign On. This will create their account and allow you to add them.
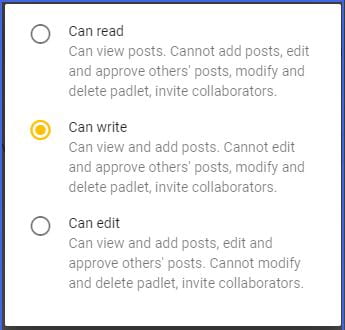
Step 3: Once you have you have selected the member you want to add you can set their individual permissions.

- Can read – This allows the person to view posts. They cannot add posts, edit and approve others’ posts, modify or delete this padlet, or invite collaborators.
- Can write – This allows the person to view and add posts. They cannot edit and approve others’ posts, modify or delete this padlet, or invite collaborators.
- Can edit – This is the default chosen option. It will allow the person to view and posts as well as edit and approve others’ posts. They cannot modify or delete this padlet, or invite collaborators.
- Can administer – This allows full permissions, including the ability to modify or delete the padlet and invite other collaborators.
Step 4: After you select the permission level, click the grey background and click Save.