What is it?
Once you’ve got a site created in Learning Spaces, you may want to edit your profile to add an avatar, change your display name, or add a link to another website (e.g. your LinkedIn profile).
What does it do?
You can change a number of aspects of your profile, but this guide will focus on:
- Editing your display name
- Uploading a profile picture
- Adding a website link
What should I know?
Step 1: Log in to one of your sites, hover over the title of your blog in the black bar at the top of the screen and click on “Dashboard”.
Note that the changes to your profile will appear everywhere in Learning Spaces, not just the blog where you initially accessed your account.
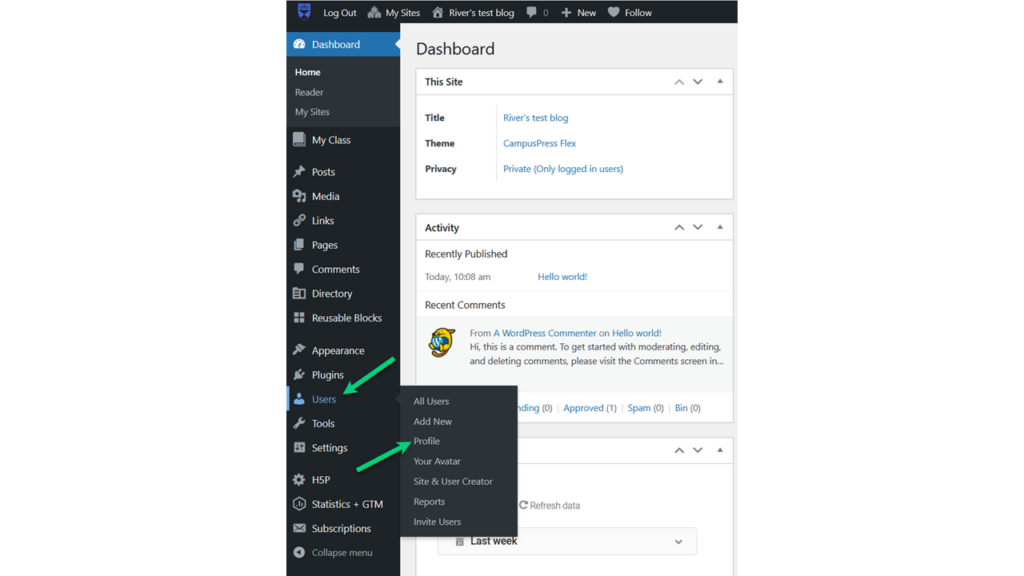
Step 2: In the side panel on the left-hand side of the screen, hover over the link for “Users” and click on the option for “Profile”.

Step 3: To change your display name, scroll down to the “Name” section and you can enter or change your nickname and use the drop-down for “Display name publicly as” to decide how your name will show. Note that you can’t change your first or last name in this screen.
Step 4: In the section “Contact Info”, you can enter a personal website. If you are using this for a public site, you may want to link to your LinkedIn or other professional websites.
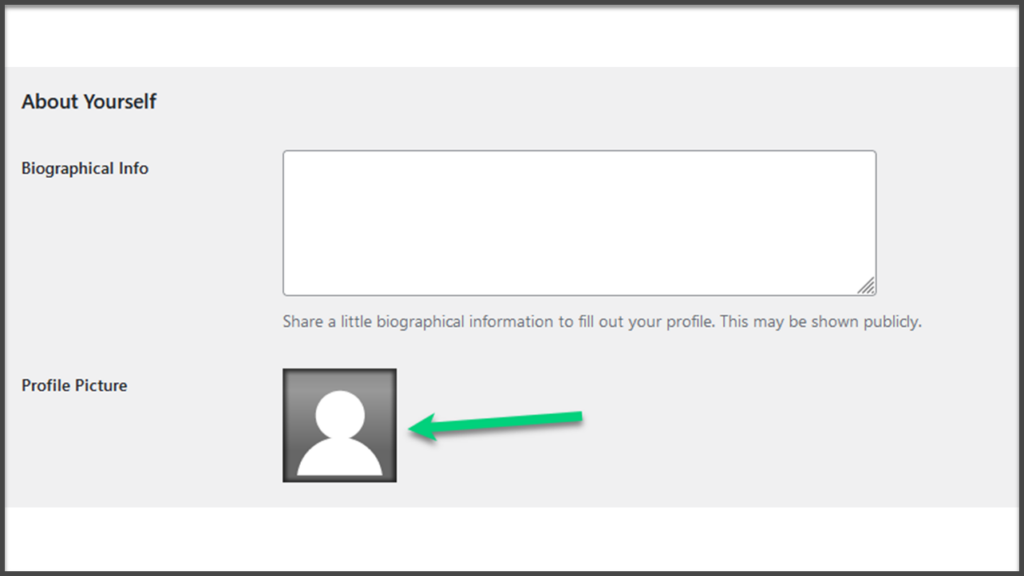
Step 5: In the section “About Yourself”, click on the icon next to “Profile Picture”.

Step 6: Click on the “Browse” button to find and select the image you want to use. Click “Upload when you’re done!
Note: You may need to crop the image you want to use – if you need to do this, you’ll be able to crop the image after you select “Upload”.
