What is it?
Breakout rooms are essentially miniature sessions within the main Collaborate session. You can assign students to these rooms and they can reconvene back into the main session.
What does it do?
Breakout rooms are ideal for group work. The instructor can enter and leave breakout rooms just as they would go round groups in a classroom. The students can collaborate in smaller groups, making use of collaborative tools and engaging in discussion.
What should I know?
Step 1: In your session, click on the Share Content tab in the side panel (this is the third item, and the icon looks like an arrow coming out of a box).
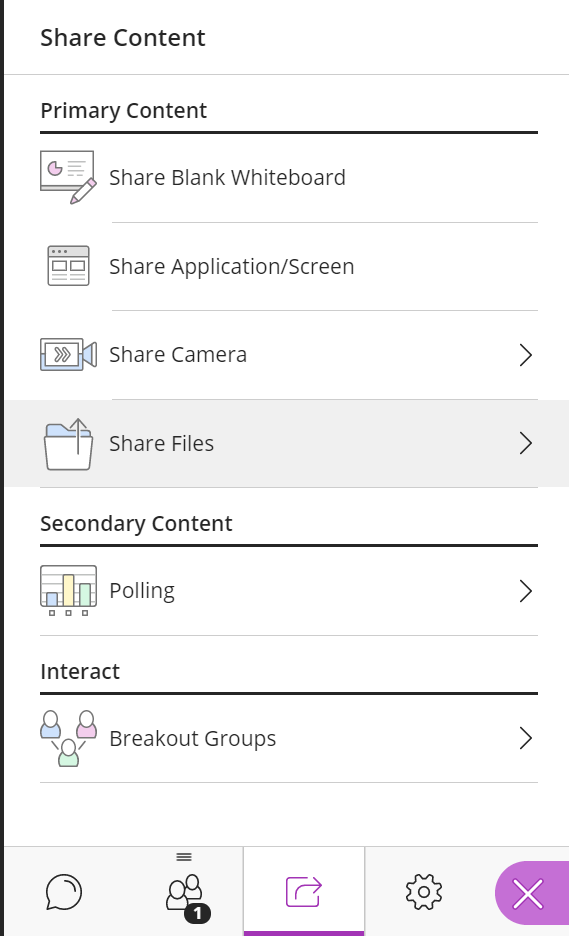
Step 2: You can create breakout groups in your session by clicking into Breakout Groups.
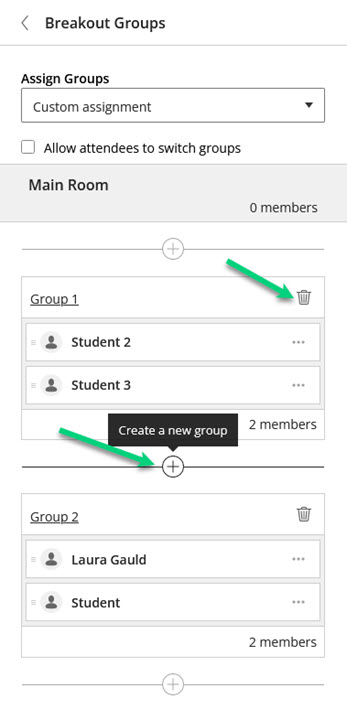
Step 3: Use the top drop-down arrow to choose between using existing groups from your module, randomly assigning students to groups, or using custom to make specific groups.
See the relevant heading below for any additional information about setting up groups with each of these options.
Step 4: Selecting the Allow attendees to switch groups will let session attendees jump between groups freely.
Step 5: To change the group names, click on the default title (e.g. Group 1). This will let you edit the name. Clicking outside of this editing field will save your changes.
Step 6: To move any students from one group to another, you can hover over the students’ names to drag and drop them into different groups.
Step 5: When your groups are all set up, click Start.
Note: When in a room, students have presenter permissions, and the recording from the main room stops.
For information on managing breakout rooms and ending the session, see our guide on using breakout rooms.
Using existing groups:
Remember, you will need to have set up groups in your module before the session to use this option.
When you select this option, you’ll see a pop-up which is checking authorisation with the module. Make sure your browser allows pop-ups!
This should take a moment to process, so be patient. Once it has finished processing, the window will disappear.
You’ll then see a drop-down menu that cannot be changed that has your module title. Below that, you’ll see a drop-down menu that will let you choose which group set you want to use.
Using randomly assign:
The only difference from the above instructions for this option is that you will need to select the Number of Groups from the drop-down menu. There will be a minimum number of four students required to choose this option, and the number of group options will be limited to prevent groups of one student.
Using custom assignment:
You will need to use the plus sign icons to create new groups until you have the number you need. You can use the bin icons to remove any groups.
To add students into their groups, you’ll need to use Step 6 above: hover over the students’ names to drag and drop them into different groups.