What is it?
Although My Dundee and Collaborate are connected, these are two different services and you will need to add a profile picture for each. This guide will show you how to set these up in each tool.
What does it do?
Uploading a profile picture is quick and easy, and you only need to do it once in each tool.
What should I know?
To change your profile picture in My Dundee
Step 1: To get to your profile page, navigate to your name on the left-hand panel in My Dundee.
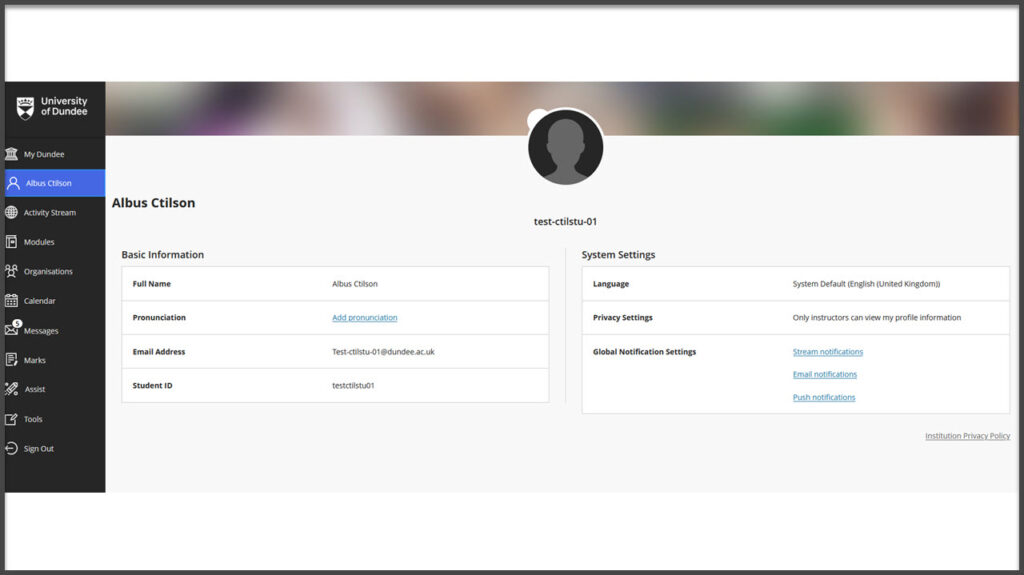
Here, you will find your profile page. On the page you will see:
- Basic information – Your full name, email address, student ID, and an area to add a pronunciation of your name. This will be available in the “Course Roster” in your modules. You cannot edit your name, email address, or Student ID.
- System Settings – Here you can find the settings for language, privacy, and global notification settings. You can change all of the settings in this area, and you can learn how to edit notifications here.
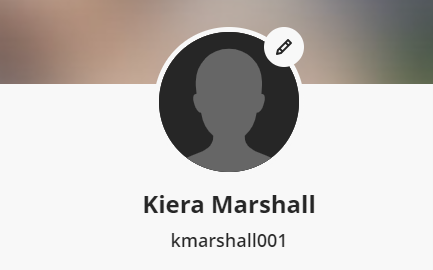
Step 2: Hover over the avatar and click the pencil icon.
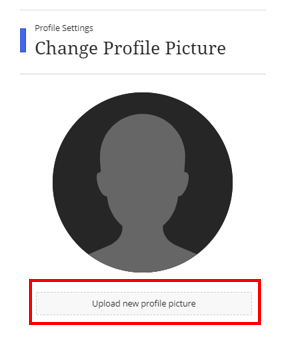
Step 3: A new panel will appear. Select Upload new profile picture.
Step 4: Find and add your chosen picture.
Step 5: Your new photo will appear. When you are happy with your photo, you do not need to do anything more as your new photo will now appear on your profile.
To upload a profile picture in Collaborate
You will need to be in a Collaborate session to add a profile picture
Step 1: Open the Collaborate panel and click on the cog wheel icon to access the Settings tab.
Step 2: If you hover over the icon next to your name, you will see a pencil icon appear. Click on this and the panel will change to allow you to upload a profile picture.
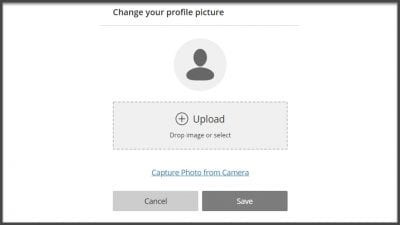
Step 3: Here you have the option to upload any image or use the device camera to take a photo. You can drag and drop an existing photo into the Upload box or click on Capture photo from camera.
Step 4: Select Upload new profile picture and search for your preferred image from your documents and click Open.
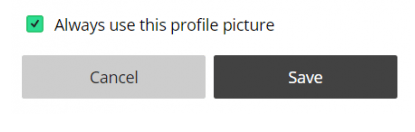
Step 5: Once you have a photo (from your device or an uploaded image), you will be able to centre and crop the image. Once you are happy with this, click I Like It!
Step 6: Select Save and remember you can choose to use this profile picture for every session. This will mean you will not have to re-upload your photo again for any of your Collaborate sessions unless you would like to change or remove the picture.