What is it?
Users, whether students or staff, now have the option to include text guidance and an audio recording of their name in their user profile. This will also appear in Assessments, Communication tools, Grade Centre, Groups and User profile.
What does it do?
The text guidance allows them to describe the pronunciation of their names phonetically, assisting other users. Additionally, users can provide a recording of their own name, with a maximum duration of 20 seconds.
What should I know?
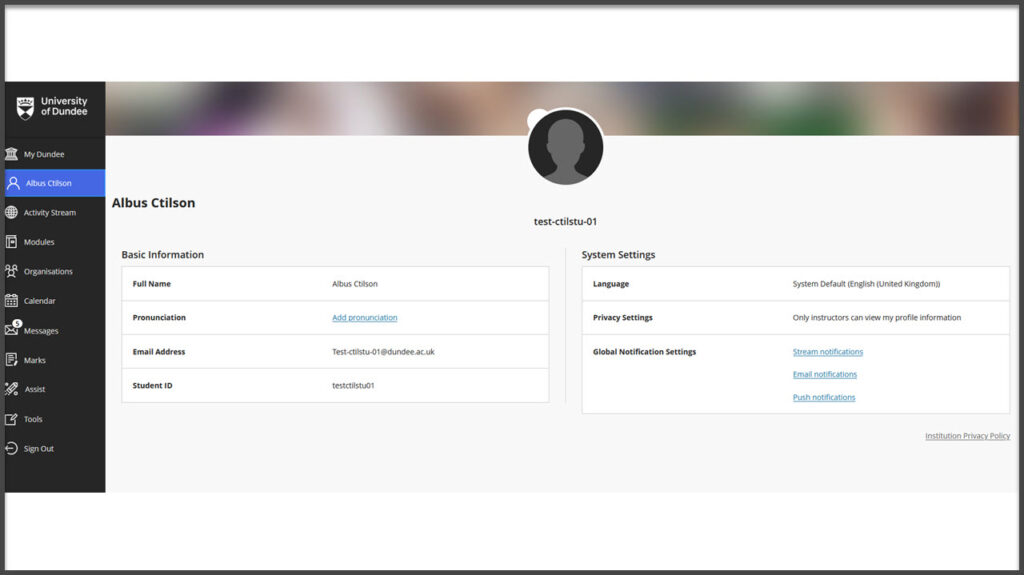
Step 1: To add pronunciation, navigate to your name on the left-hand panel in My Dundee.

Here, you will find your profile page. On the page you will see:
- Basic information – Your full name, email address, student ID, and an area to add a pronunciation of your name. This will be available in the “Course Roster” in your modules. You cannot edit your name, email address, or Student ID.
Step 2: Click on ‘Add pronunciation’ to add a pronunciation guide for your name, here you will see a new panel appear.

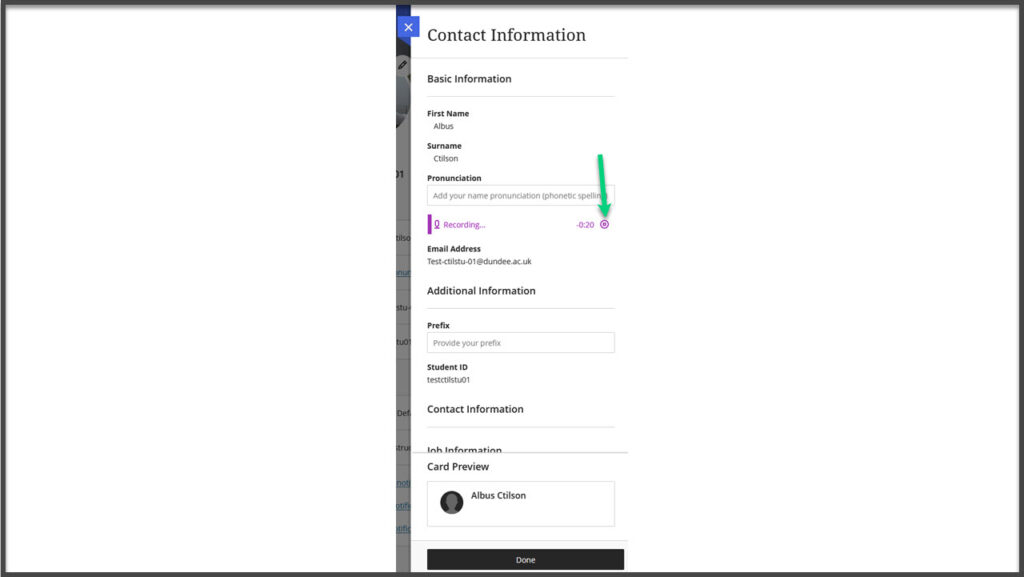
Step 3: Click on the text box under “Pronunciation” to add the text phonetic spelling of your name. If you would like to record an audio, click on the button for “Record name pronunciation”. Once you’ve done this, you’ll see this recording area turn purple with a notification that you’ll have 20 seconds to record your name. It will then give you a countdown from 3 and start recording automatically.

Step 4: Click on the square in the circle to end the recording once you have finished.

Step 5: Play back your pronunciation to make sure you’re happy with it. If you’re not, you can click the X icon to delete it and record it again.

Step 6: Click “Done” at the bottom of the side panel to save your changes.
