What is it?
Discussion boards are essentially student-led forums on Blackboard. Students (and staff) can contribute a reflective piece of work, attach images, embed videos, or add external links.
What does it do?
You can create marked or unmarked discussion boards for discussion and collaboration on a topic.
What should I know?
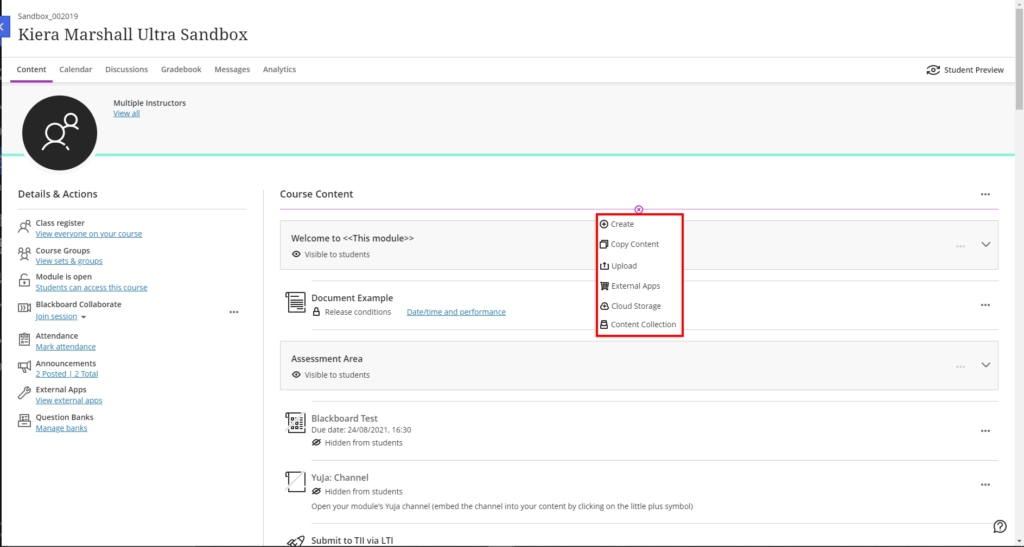
Step 1: From the course content page, hover over where you want the discussion board to be, then click on the +, and select Create from the menu.

Step 2: In the right-hand panel, select Discussion at the bottom of the options.
Step 3: You can enter the title by clicking on it and editing the default text.
Step 4: You add a description, prompt, or instructions by adding text in the centre of the screen.
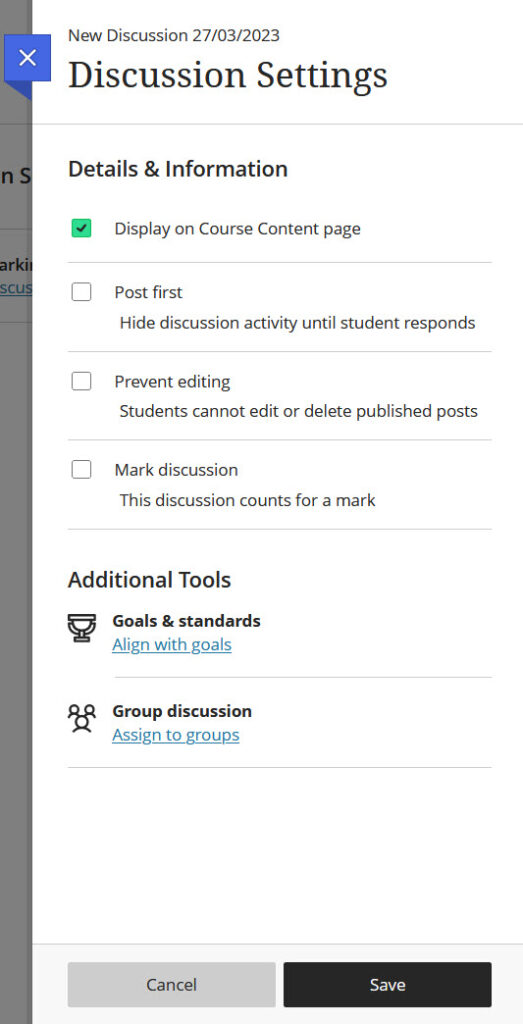
Step 6: Click on the cog wheel to open the settings for the discussion board on the right-hand panel. This will open a side panel that will allow you to adjust a few settings.

You should make sure that you keep Display on Course Content page ticked, as otherwise it will remove this Discussion board from where you added it. It will when only be available through the Discussions tab in the module, and may be missed by students.
Step 7: You can decide a few things here including if students have to add a post before they can see other posts, and you can prevent students from editing posts they have made.
Step 8: You can also tick the option for Mark Discussion. This create a new section where you can enter in the due date, mark category, marking schema, total points, and add a rubric.
Step 9: You can also assign this to groups, if you want to have a space for small group discussion and collaboration.
Step 5: Save your work
