What is it?
One of the most common ways to communicate with students on your module is by using announcements.
What does it do?
Announcements are shown when a student logs in to the module and they will have to interact with it for it to go away. They will also appear on the activity stream, so it is a good way to communicate important messages to all your students collectively. They are collected in the ‘announcements’ section in your module, so you and your students will have an archive of all of the announcements for the module.
What should I know?
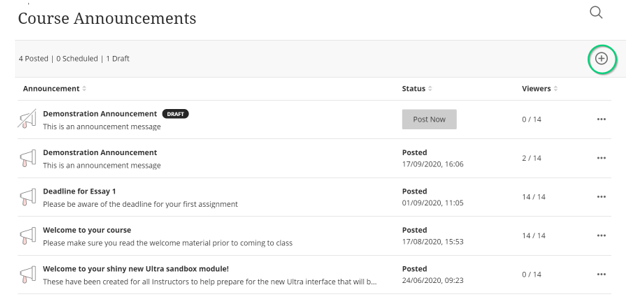
Step 1: To create an announcement within your module, go into your module and from the left-hand menu, click Announcements.
You will be taken to an archive of announcements, where you can see all the announcements that have been created for your module in chronological order. You can also see when an announcement was posted and how many students have seen it.
Step 2: To create a new announcement, click on the + icon in the top right.
Step 3: Create a title, select the recipients from the drop-down list (leave as all course members to send to everyone in the course) and write an announcement message.
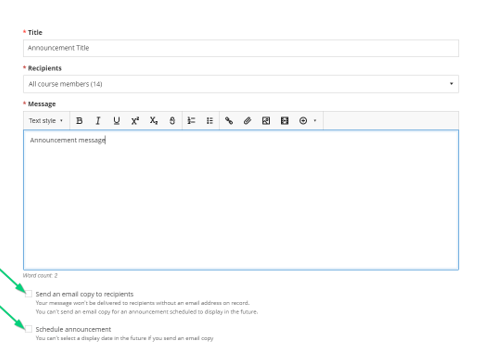
Step 4: Tick send an email copy to recipients to send your announcement as an email as well. Please note that you cannot send announcements if your course is set to private, modules need to be open and accessible to students for announcements to be sent.
Step 5: Tick the option for Scheduling announcements to you to decide when to release your announcement or customise the window of time that it is visible. This can be useful if, for example, you want to use an announcement to remind students about a quiz or assignment but hide it once the due date has passed.
You currently can’t both email and schedule your announcement, although we have requested this combination of features from Blackboard.
Step 5: Click Save when you’re done.
Step 6: Click Post now when you’re ready to release your announcement.
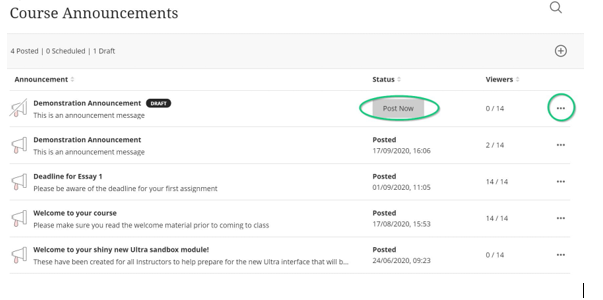
The announcement you have created will sit as a draft until you opt to post it. Draft announcements will have a line through the icon and a black icon beside it saying draft.
The three dots on the far right-hand side of each announcement allow you to edit, copy or delete your announcement.
Viewing Announcements in Student Preview Mode
You can view your announcement as your students would by refreshing your window and then going back into your module and entering the Student Preview mode.
Students will see your announcement as a pop-up which they have to dismiss before they can access the course content.