What is it?
Your profile page in My Dundee has some basic information about you, including a few areas you can edit.
What does it do?
This has your basic information filled in by default from the information in our student record systems, some notification and privacy settings that you can edit, and an area to add a profile picture.
What should I know?
Step 1: To get to your profile page, navigate to your name on the left-hand panel in My Dundee.
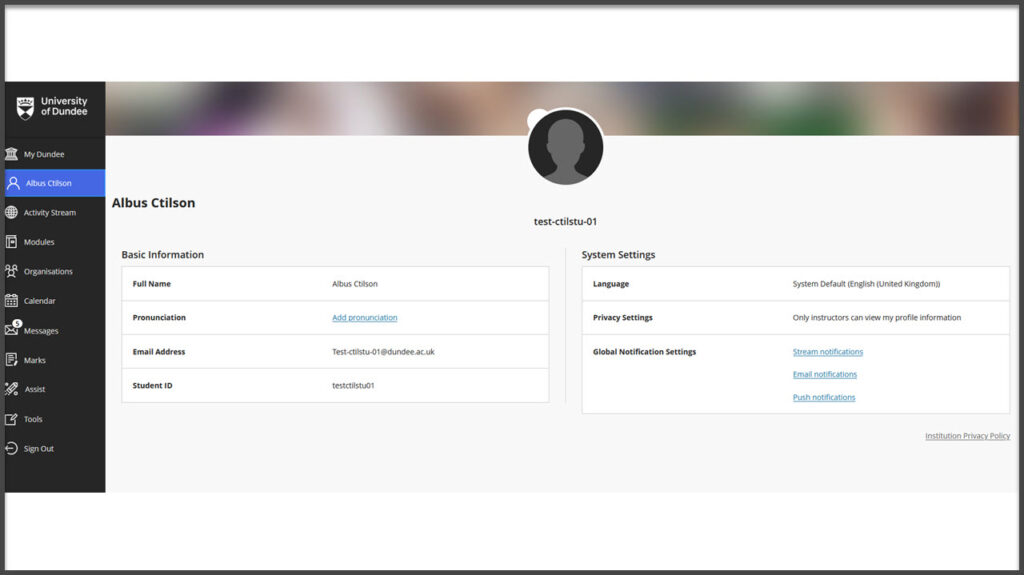
Here, you will find your profile page. On the page you will see:
- Basic information – Your full name, email address, student ID, and an area to add a pronunciation of your name. This will be available in the “Course Roster” in your modules. You cannot edit your name, email address, or Student ID.
- System Settings – Here you can find the settings for language, privacy, and global notification settings. You can change all of the settings in this area, and you can learn how to edit notifications here.
You do not have to do anything further on this page, but you may want to upload a profile picture of yourself or add a pronunciation guide for your name.
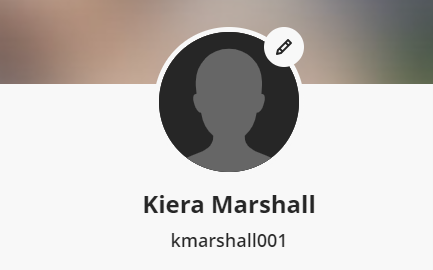
Add a profile picture
If you want to add a profile picture, we recommend a professional photo or avatar where your face is clearly visible.
Step 1: Hover over the avatar and click the pencil icon.
Step 2: A new panel will appear. Select “Upload new profile picture”.
Step 3: Find and add your chosen picture.
Step 4: Your new photo will appear. When you are happy with your photo, you do not need to do anything more as your new photo will now appear on your profile.
Add pronunciation for your name
Here you can add text for a phonetic pronunciation guide for your name or an audio recording.
Step 1: Click on the link “Add pronunciation”.
Step 2: A new panel will appear. Click on the text box under “Pronunciation” to add the text phonetic guide.
Step 3: If you want to record audio, click on the button for “Record name pronunciation”.
Step 4: Depending on your browser and browser settings, you may see a pop-up box asking if My Dundee is allowed to access your microphone. Select the microphone you want to use (if you have more than one set up), and click “Allow”.
Step 5: Once you’ve done this, you’ll see this recording area turn purple with a notice that you’ll have 20 seconds to record your name. It will then give you a countdown from 3 and then start recording automatically.
Step 6: Click on the square in the circle to end the recording once you have finished.
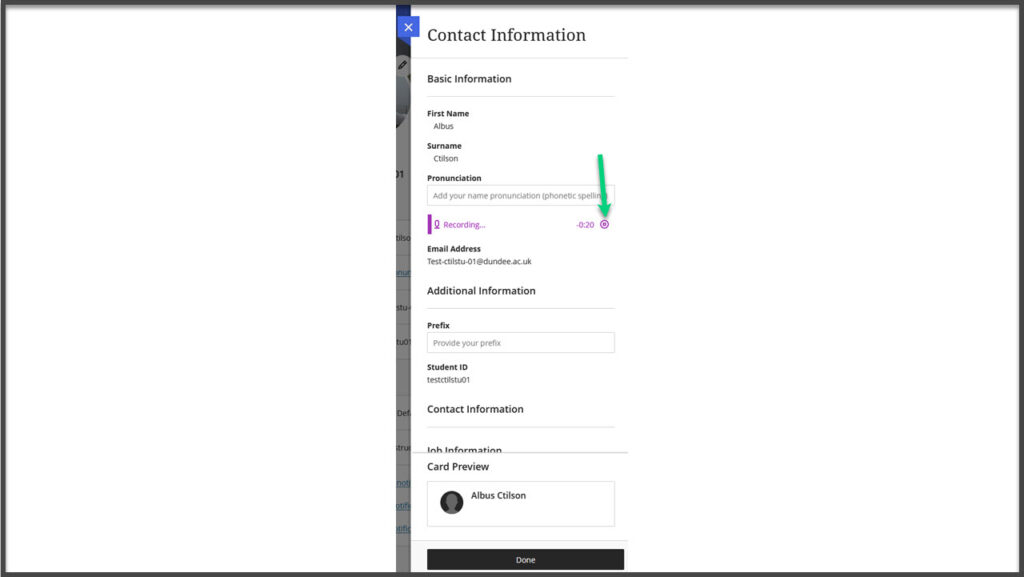
Step 7: Play back your pronunciation to make sure you’re happy with it. If you’re not, you can click the X icon to delete it and record it again.
Step 4: Click “Done” at the bottom of the side panel to save your changes.