What is it?
A Blackboard test allows you to create a test or quiz with a variety of question types that can be automatically marked. Please not that some question types, such as essay questions, will need to be manually marked.
What does it do?
Tests created in Blackboard that use questions with correct answers included are marked automatically. Instructors can override marks if necessary, but the automatic marking can reduce staff workload for certain types of assessment questions (e.g. multiple choice or true/false). You can also include feedback on incorrect choices, so students get question-specific feedback immediately after submitting their work.
What should I know?
Step 1: Navigate to your module Course Content and select the plus icon and select create from the menu.
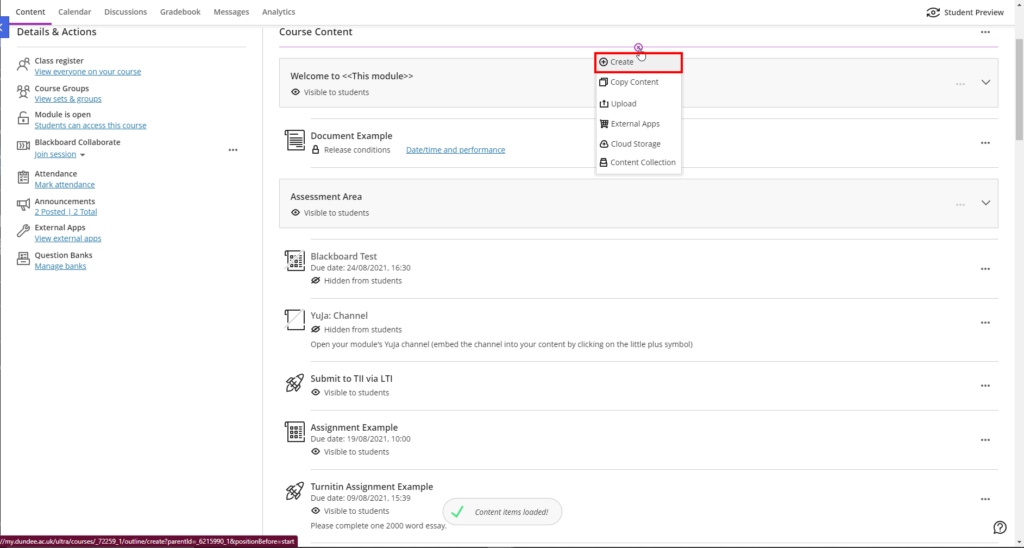
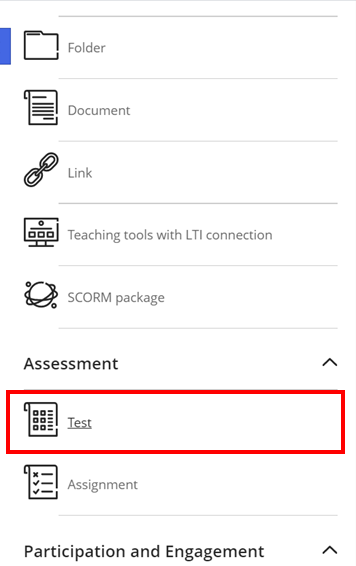
Step 2: On the right-hand panel, under Assessment, select Test.
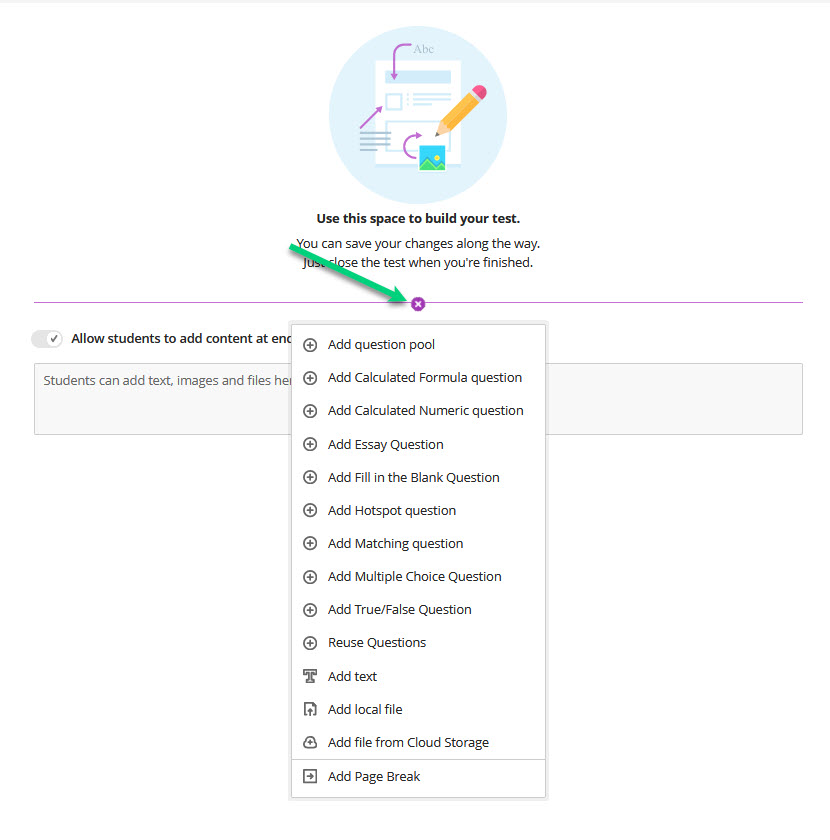
Step 3: Click the plus sign icon to add instructions by using the Add Text option, select your question type, or add a page break.
Page breaks are really useful to help order your test questions and control what students see at one time. You can still randomise questions, but you can decided if your questions are randomised within a page, or if pages themselves are randomised. For more information on this, see our guide on settings for Blackboard tests in the section on “Presentation options”.
Note: Essay questions do not include a ‘correct’ answer in the field, and therefore will not be automatically marked.
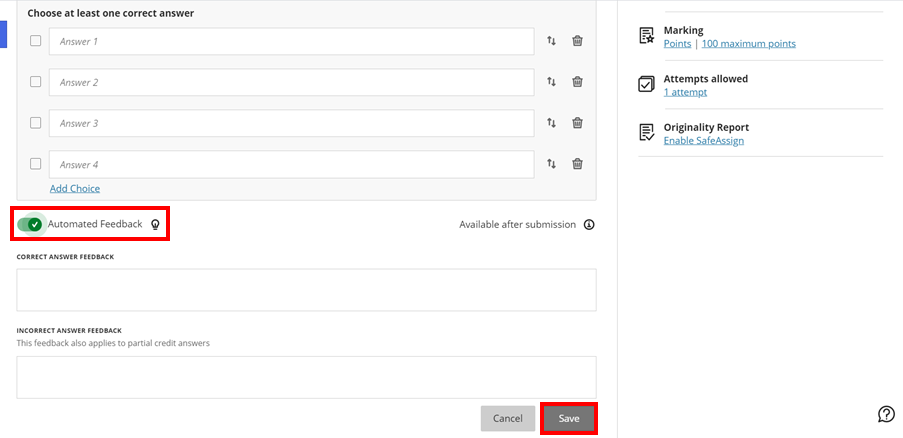
Step 4: Using the text boxes in your chosen question type (or image if you are using a hotspot question), add your questions, answers, and points per question.
Step 5 (optional): You can now add “Extra credit” questions by ticking the box for “Extra credit” next to the points.
Step 6 (optional): Enable the Automated Feedback feature. You will be able to provide question-specific feedback for both correct and incorrect answers.
You can use the settings to control when students see this feedback. For more information on how to set this up, read our guide on Blackboard test settings.
Step 6: Click on the cog wheel next to Test Settings to add some necessary information. Here you can add the due date and time. For a full explanation of this settings panel, read our guide on Blackboard test settings.
Click Save in this side panel when you are done.
Step 7: Make sure to edit the visibility for the test to release it to students.
Finally, we strongly recommend that once you have completed setting up your test that you use your Student Preview account to view and test any settings to make sure that the test is set up and functioning as you would expect.